
Controlling a Drone with a PS4 Controller
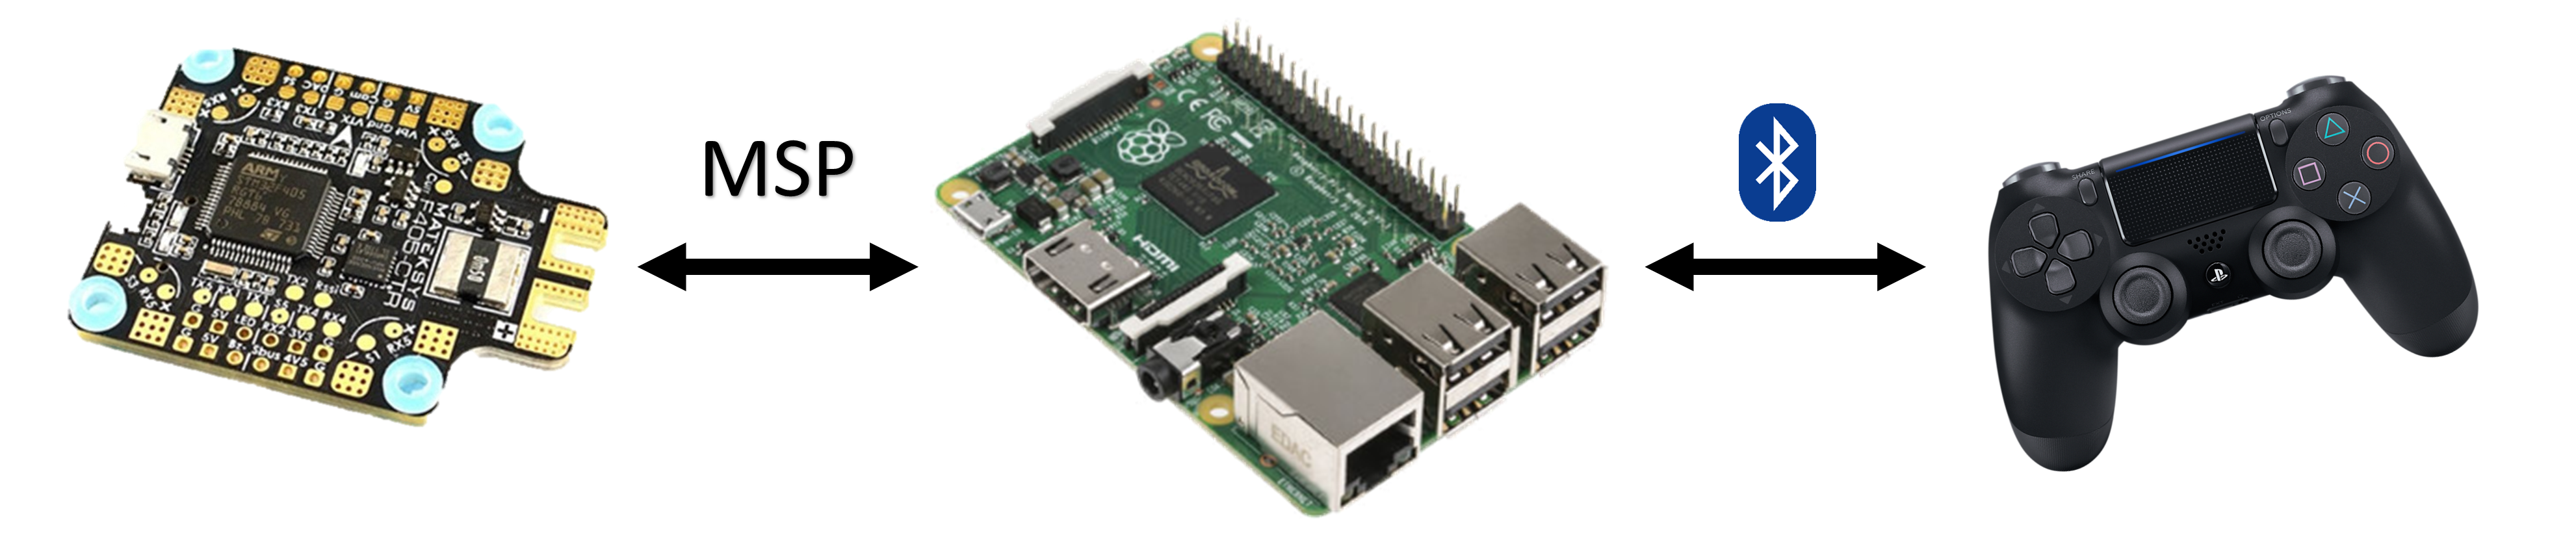
This post details a method of using a Playstation 4 controller as an input method to control a drone running Betaflight firmware (or similar). Essentially it uses an on-board companion computer such as a Raspberry Pi to connect to the controller, convert the signals and send them to the flight controller using the MultiWii Serial Protocol. Although a Playstation 4 controller is used here, the method should allow any standard game controller to be used in the same way.
Note: Understand that MSP is not recommended as an input method during flight by the Betaflight team, and so requires modification to the built-in failsafes. If you crash your drone or damage anything using the control method detailed here don’t blame me
Controller Inputs
To start, the PS4 controller can be connected to the Raspberry Pi using bluetooth. This can be done either through the terminal using bluetoothctl or with a third party gui. Once it is connected, Approximate Enigneering’s Python Controller Library is used to get the controller inputs. For this project, only the two analog sticks and some buttons will be used, but the controller library can get the values from the controller’s touchpad and internal inertial measurement unit if required. The library supports a wide range of common game controllers, see here for details on other supported controllers.
from approxeng.input.selectbinder import ControllerResource

with ControllerResource() as joystick:
    while joystick.connected:
        x1,y1,x2,y2,r1_button,l1_button = joystick['lx','ly','rx','ry','r1','l1']
Control Mapping
The main control inputs to the drone will be pitch, roll, throttle and yaw. For consistency with standard RC controllers, these will be mapped to the PS4 controller analog sticks. The output for analog controls from the approxeng input library vary from -1 to 1 in the x and y for each analog stick. These values must be shifted and scaled before they are sent to the flight controller. Other buttons can also mapped to any available aux RC inputs (to arm the drone for example).
The exact map of each control input will largely depending on the requirements of the project. In this case, the RC values within Betaflight vary from 0 to 3000, with 1500 as the mid-point. The throttle control is slightly different, as most game controllers have self-centering analog sticks, unlike most RC controllers used for drones.
roll = (x2+1) * 1500
pitch = (y2+1) * 1500
throttle = (y1+1.2561) * 820
yaw = (x1+1) * 1500

# since PS4 controller has self-centering throttle
if throttle < 1030:
    throttle = 1030
This conversion takes the pitch, roll and yaw imputs from -1 to 1 and directly maps them on a scale from 0 to 3000, with each self-centering at 0, mapping to the 1500 midpoint in Betaflight. The throttle mapping in this case sets the self-centering stick midpoint to the minimum throttle of 1030 and the maximum stick input to the maximum throttle of 1850. This may vary depending on indivudual setups so different shift and scale values can be calculated.
Sending the RC Data
MultiWii Serial Protocol (MSP) will be used to send data from the Raspberry Pi to the flight controller via a serial connection. The pyMultiWii Python library will be used to take the RC values calculated above and send them to the flight controller. Once the library is installed and imported, the serial port which the flight controller is attached to can be specified. The roll, pitch, throttle, yaw and aux inputs can then been specified, and placed in an array. The order of inputs within this array depends on the order expected by the flight controller. The default for Betaflight should be the same as shown here. The sendCMD function then takes the input array and sends them to the flight controller.
from pymultiwii import MultiWii

BOARD = MultiWii("/dev/ttyS0")
BOARD = arm() # does this need to be here?

data = [roll,pitch,throttle,yaw,aux1,aux2,aux3,aux4]
BOARD.sendCMD[16,MultiWii.SET_RAW_RC,data)
Specifying aux inputs can be useful for switching modes on the flight controller and arming/disarming the drone.
Betaflight Setup
Betaflight can only accept a single type of reciever input at any one time. Usually this would be something like PPM or SBUS from a standard RC transmitter, but this needs to be changed to MSP to accept the MSP inputs from the Raspberry Pi. This means that no standard RC receiver needs to be connected, as it is not possible to use both at the same time, or switch without rebooting the flight controller.
As using MSP as an input method during flight is not reccommended by the Betaflight developers, some of the built-in failsafe flags need to be disabled in order to allow the drone to arm. This requires modifying and re-building the Betaflight firmware - information on how to do this can be found here.
### to add…
- hardware connection diagram
- GIF of control